> For the complete documentation index, see [llms.txt](https://docs.xbstation.com/llms.txt). Markdown versions of documentation pages are available by appending `.md` to page URLs; this page is available as [Markdown](https://docs.xbstation.com/xblink-mini/quickstart-guide.md).
# Quickstart Guide
When you received XBLink Mini, all software has been installed, you can check your credential on your box.
{% hint style="danger" %}
Please do not install any software or flash XBLink Mini.
{% endhint %}
## Step 1: Setup XBLink Mini
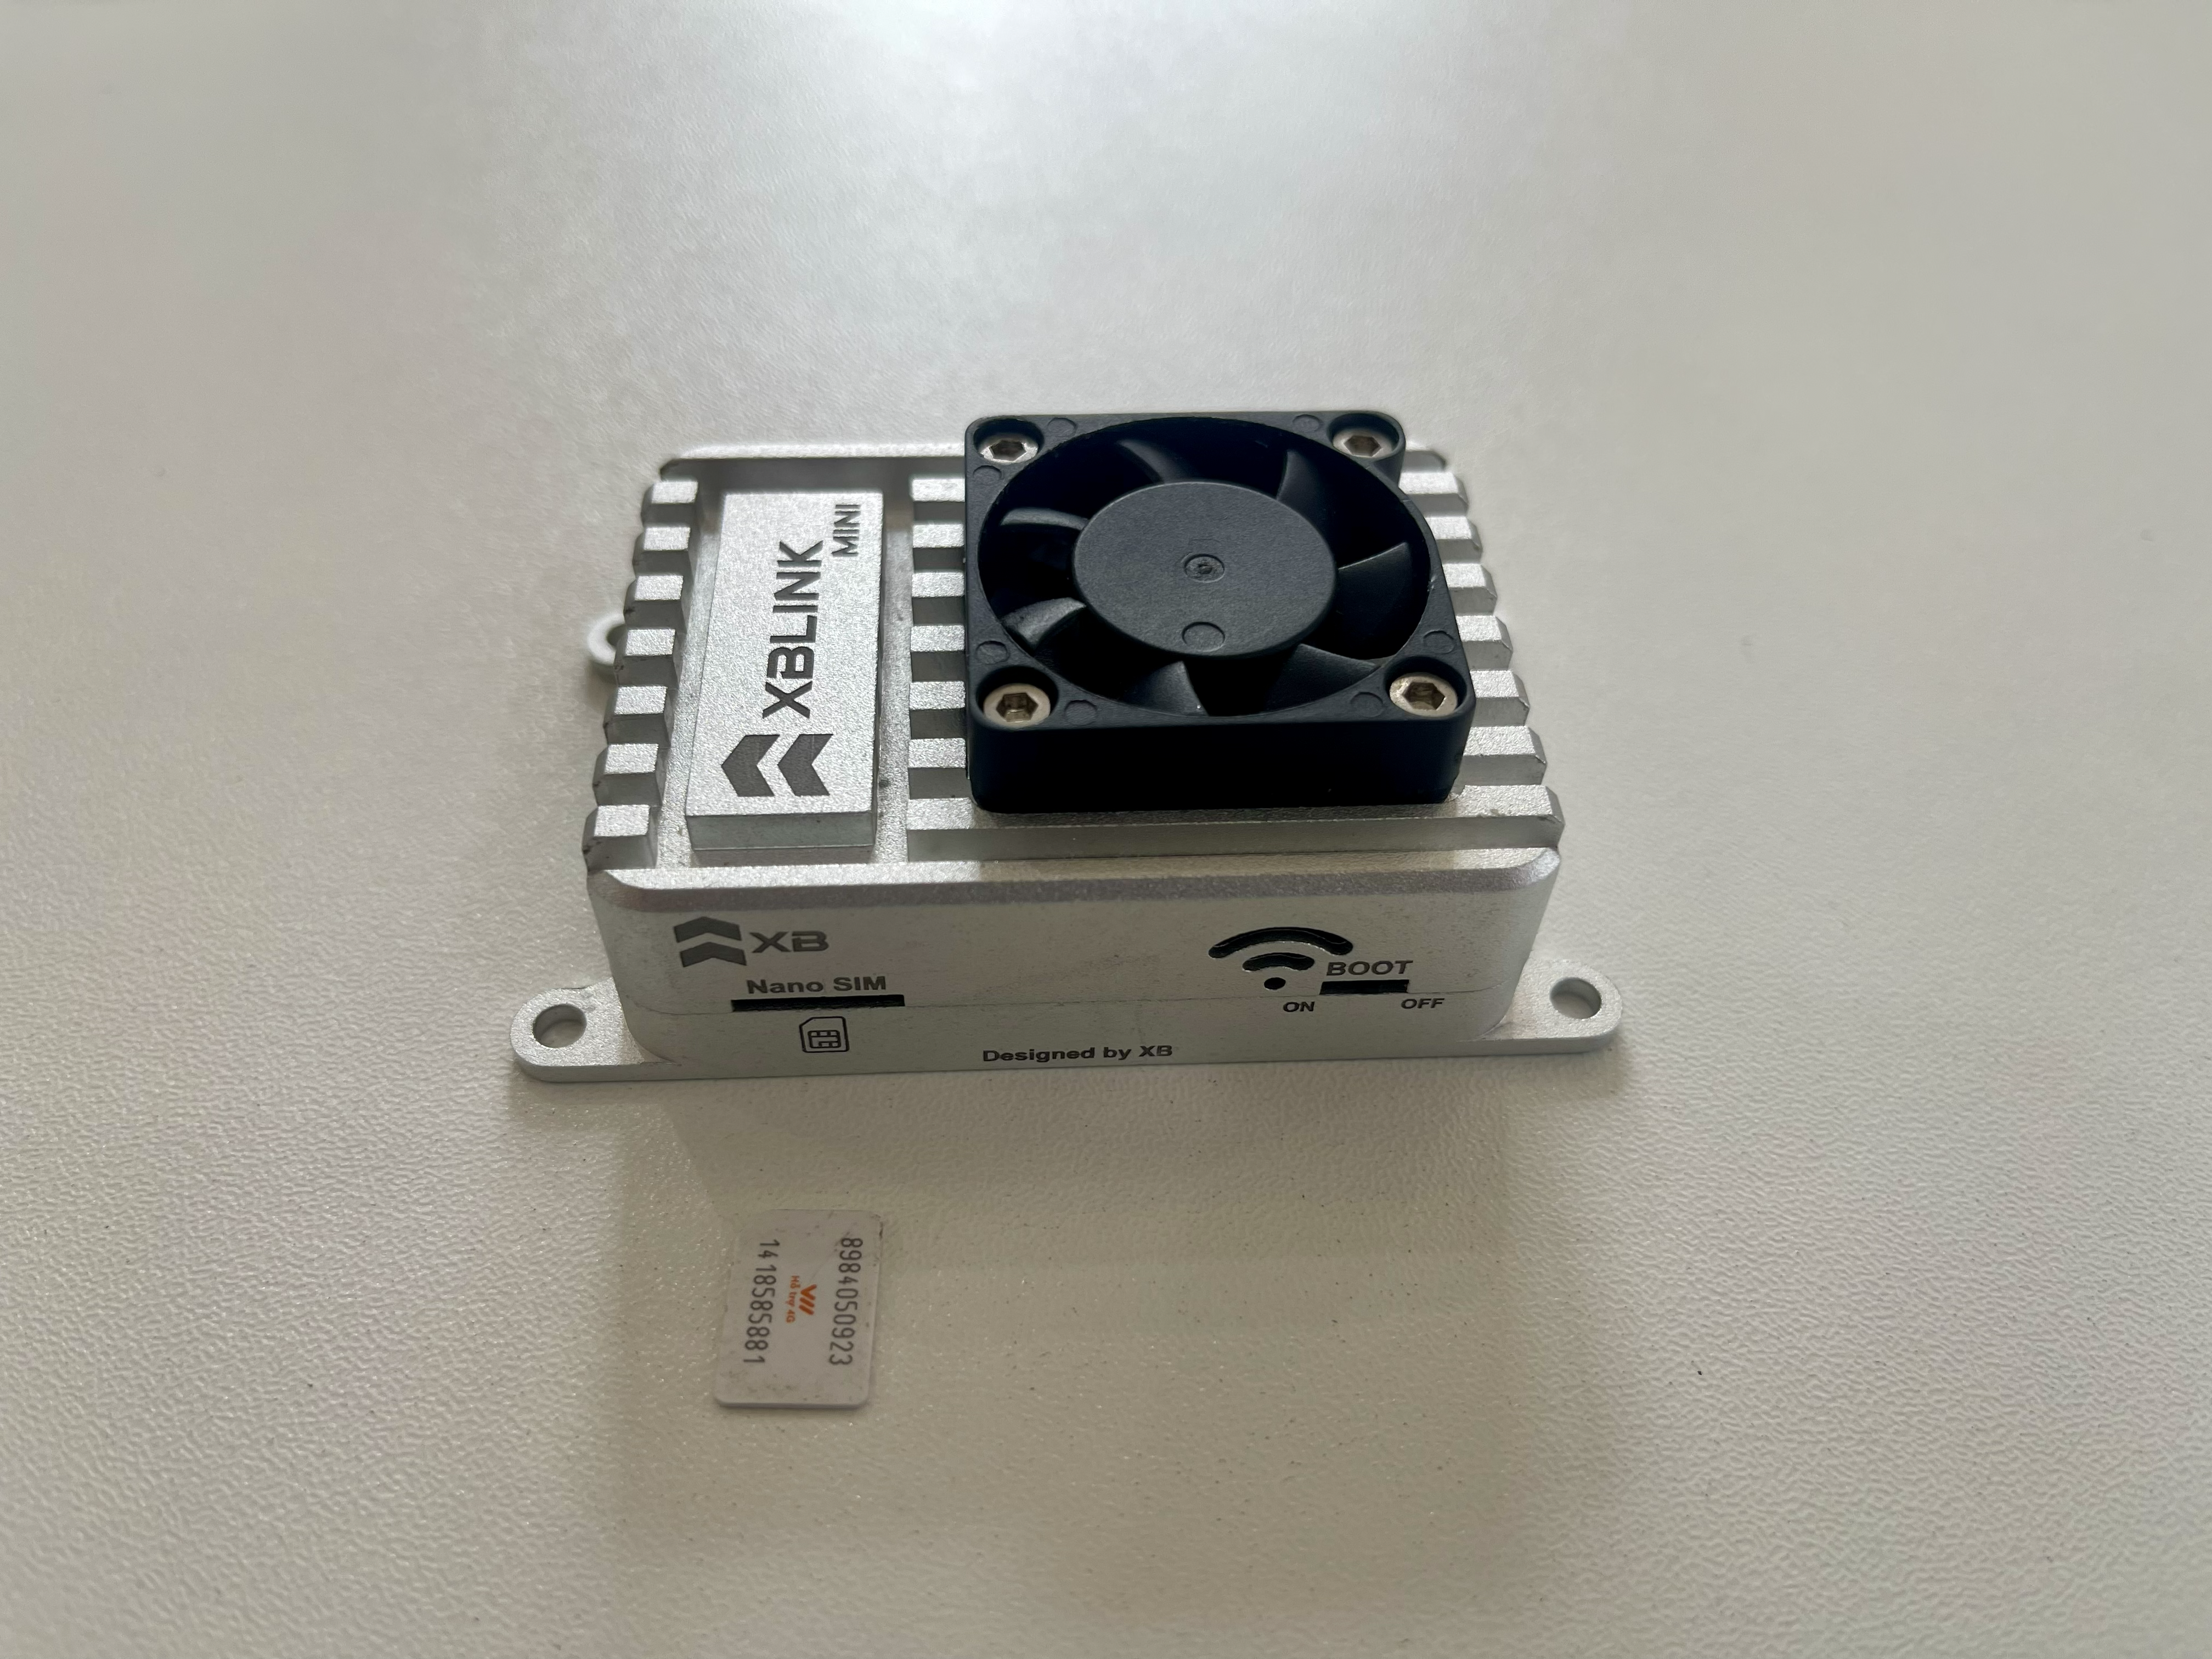
### 1. Insert Nano SIM Card
SIM Card must be faced up
{% hint style="info" %}
The SIM card is recessed into the enclosure and you might need a tool to push it into the socket. You can hear a "**click**" when the card is inserted.
{% endhint %}
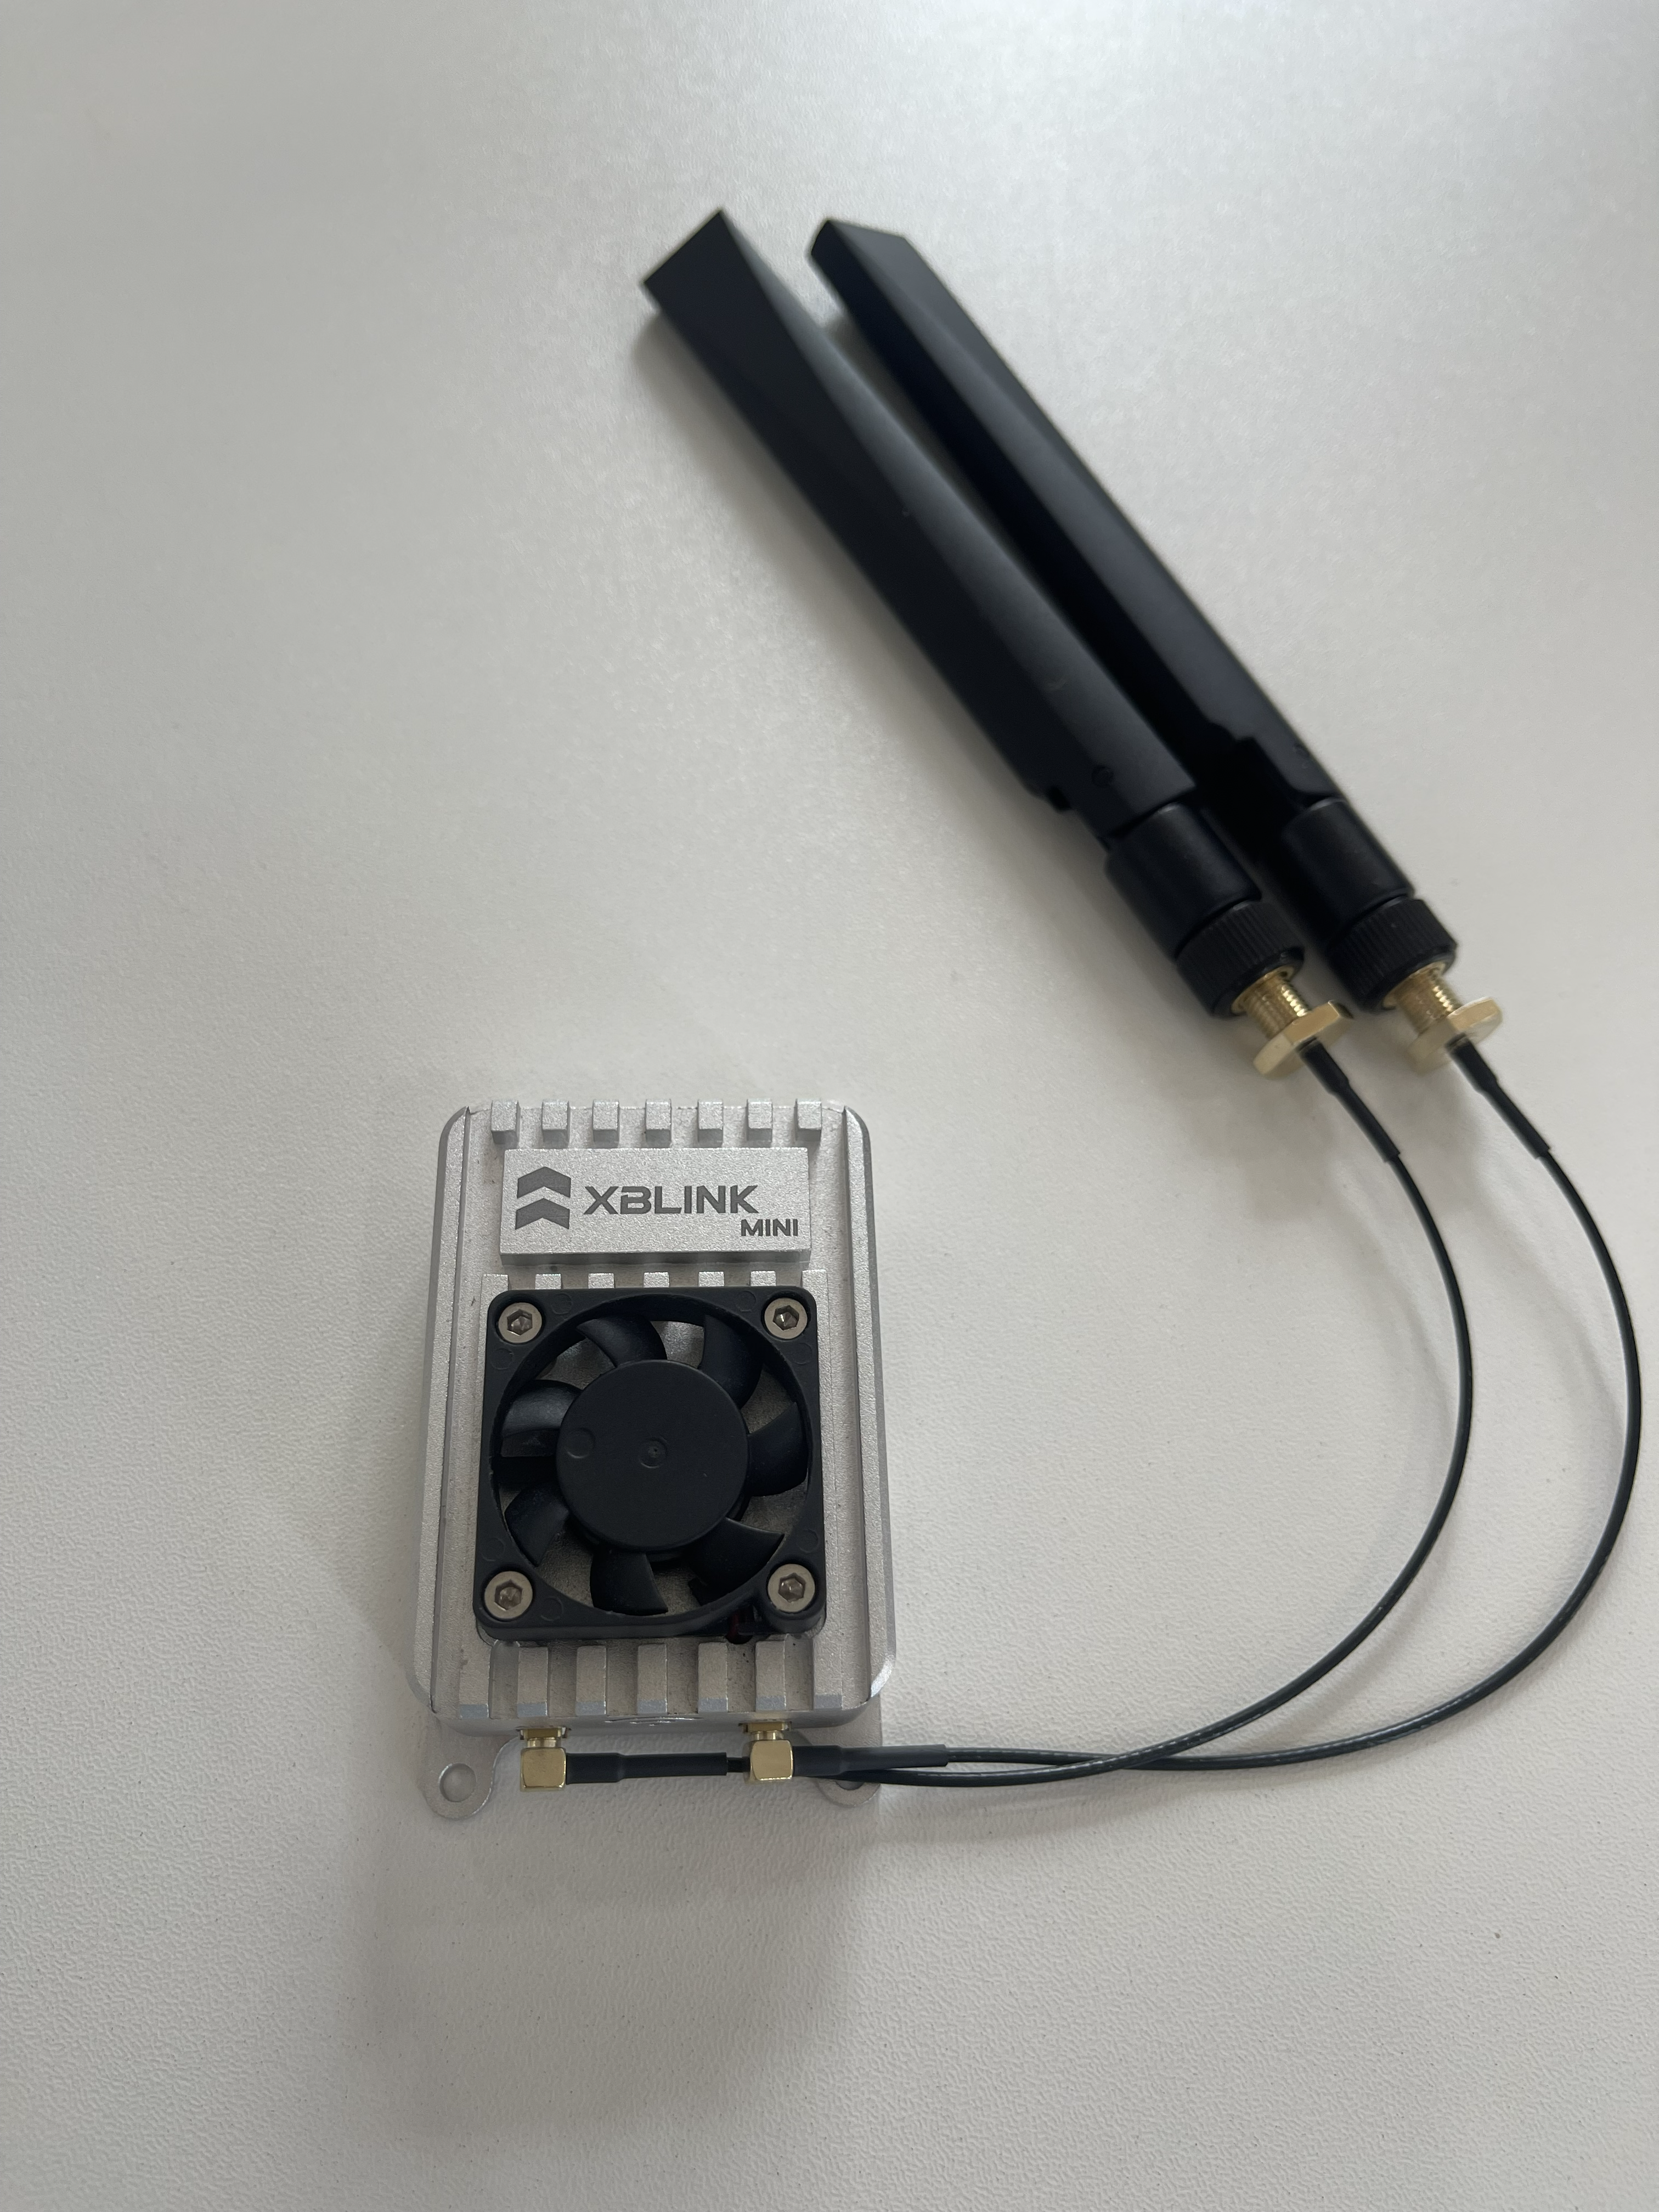
### 2. Connect antennas
Connect Antennas to XBLink Mini
{% hint style="warning" %}
**Note:** Be careful with the antenna port. Remove or Install it in a **straight angle**.
**We are not responsible if the antenna is damaged due to physical impact**
{% endhint %}
{% hint style="info" %}
**Antenna installation and removal instructions:** [**here**](https://www.youtube.com/watch?v=lAXGtti88gc)
{% endhint %}
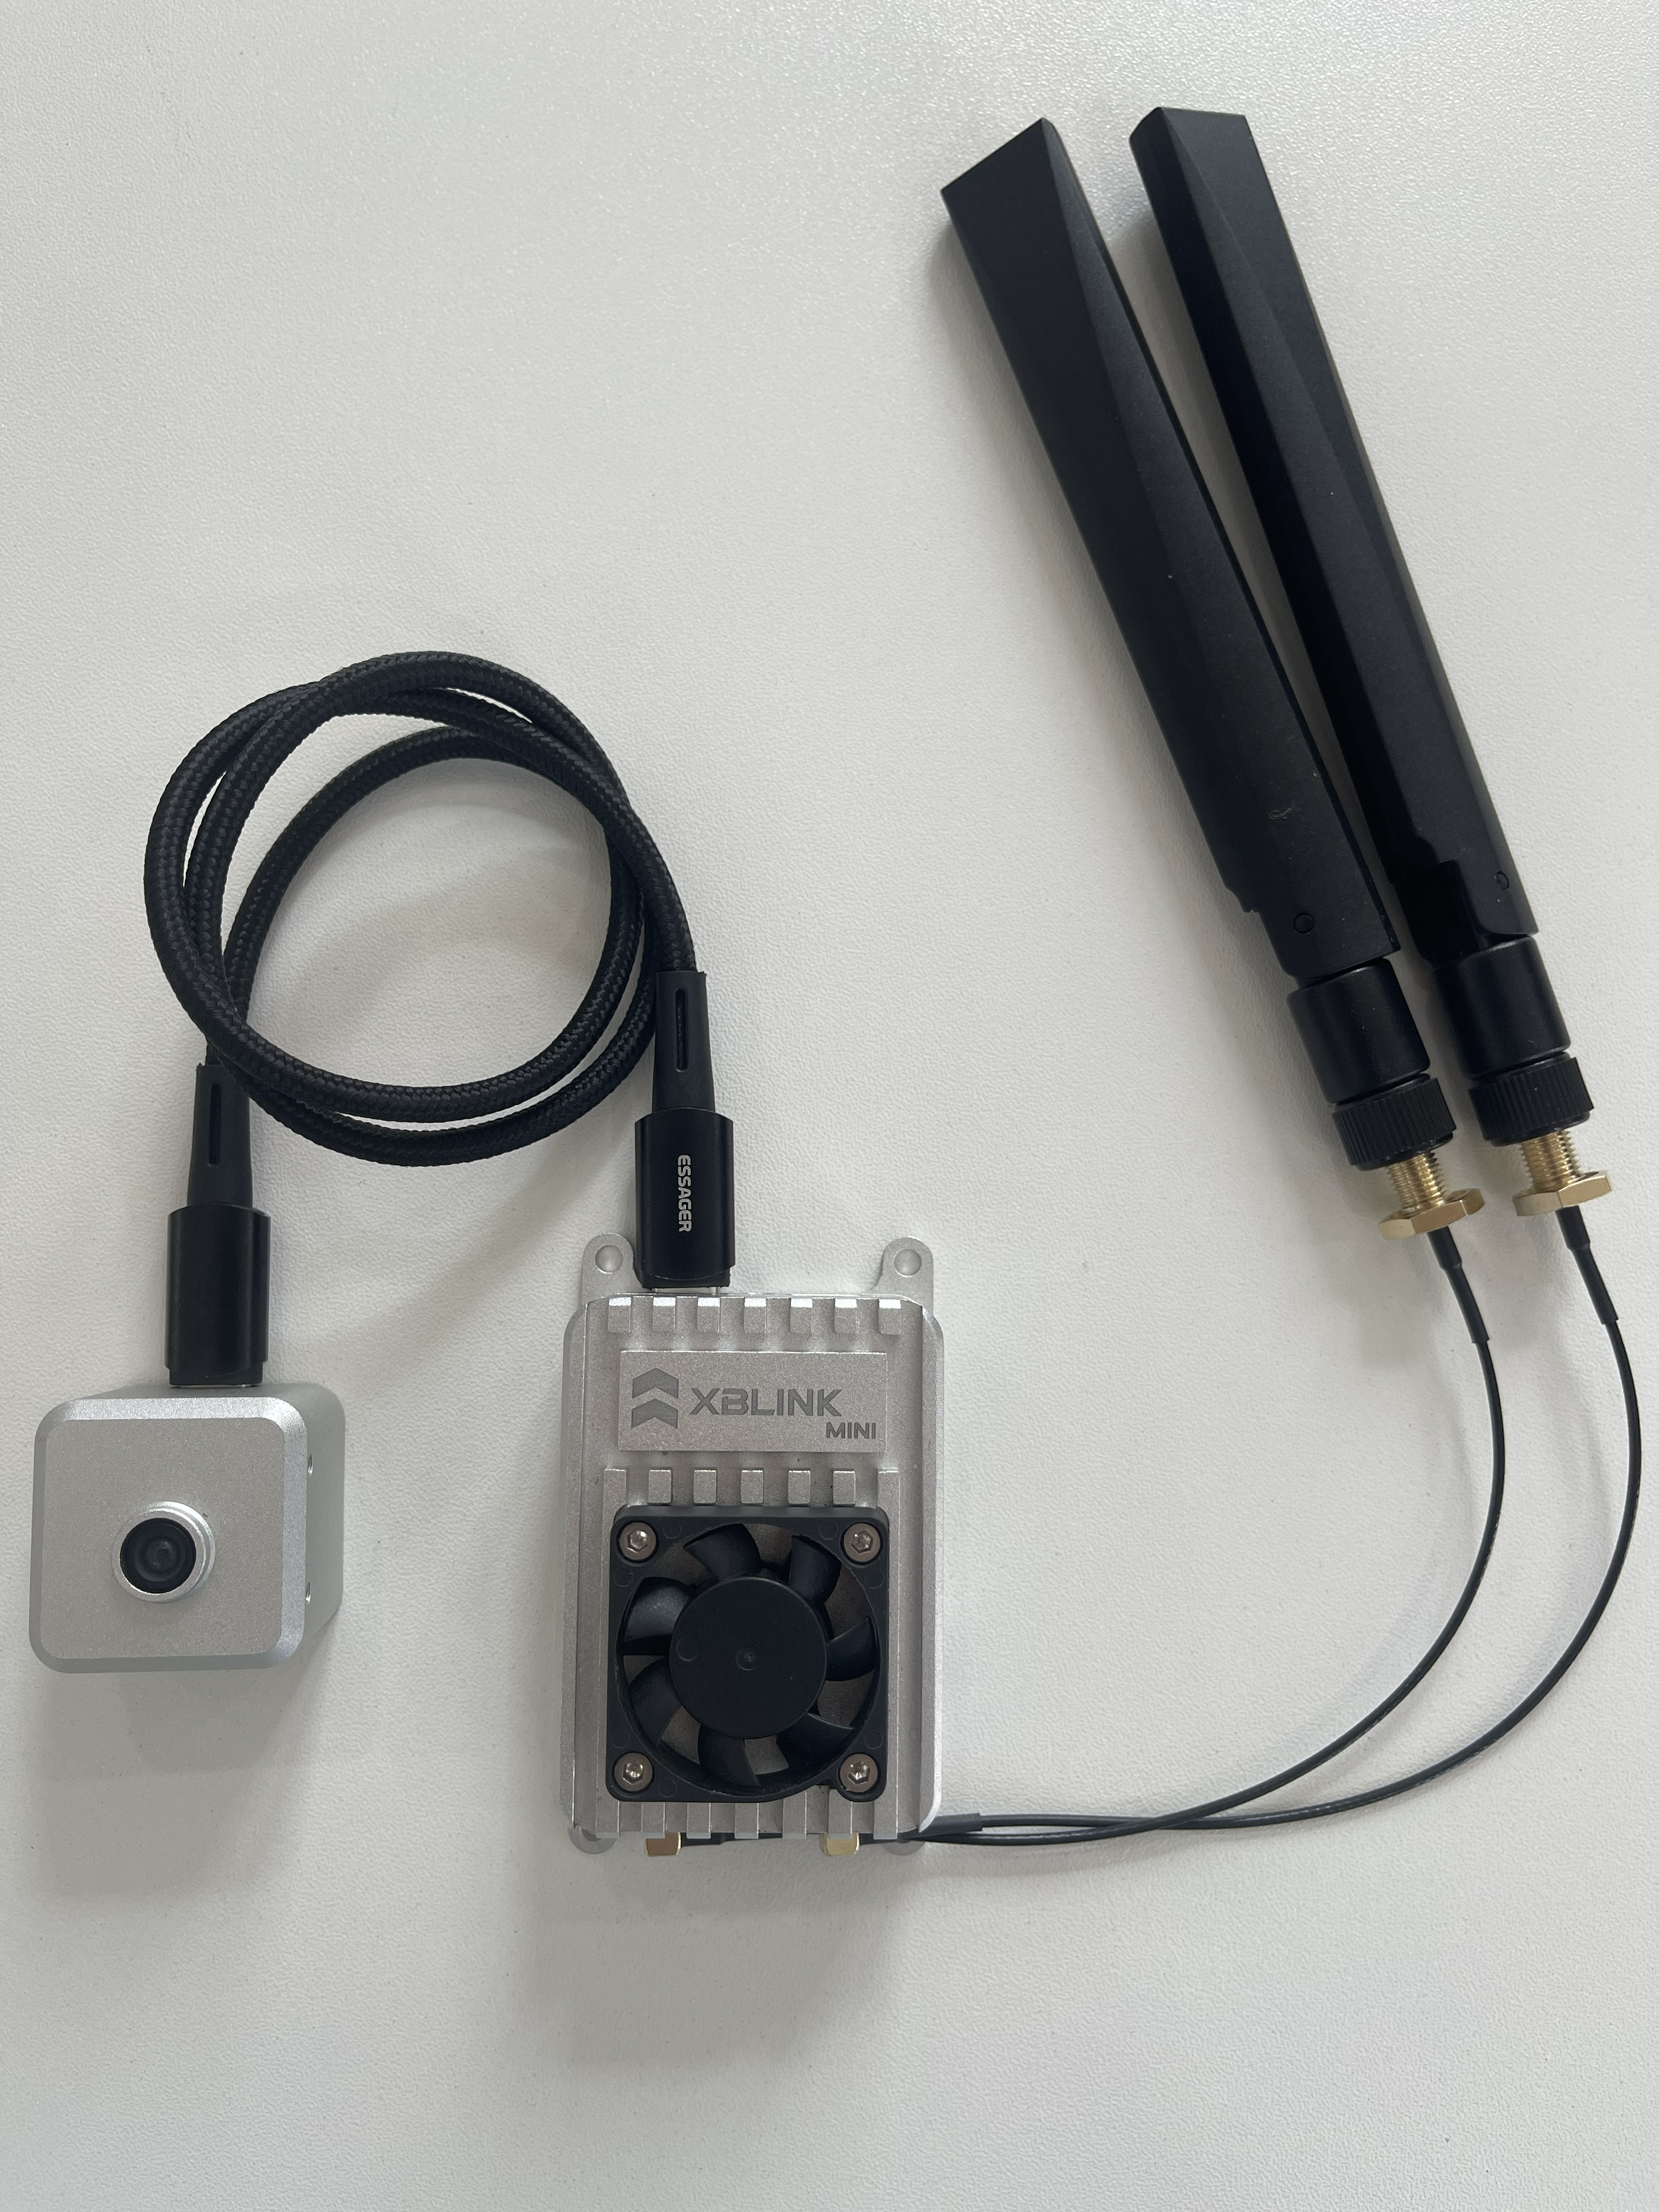
### 3. Connect XBCam V2
Connect XBCam V2 to USB type C port.
{% hint style="info" %}
**Note:** We only currently support XBCam
{% endhint %}
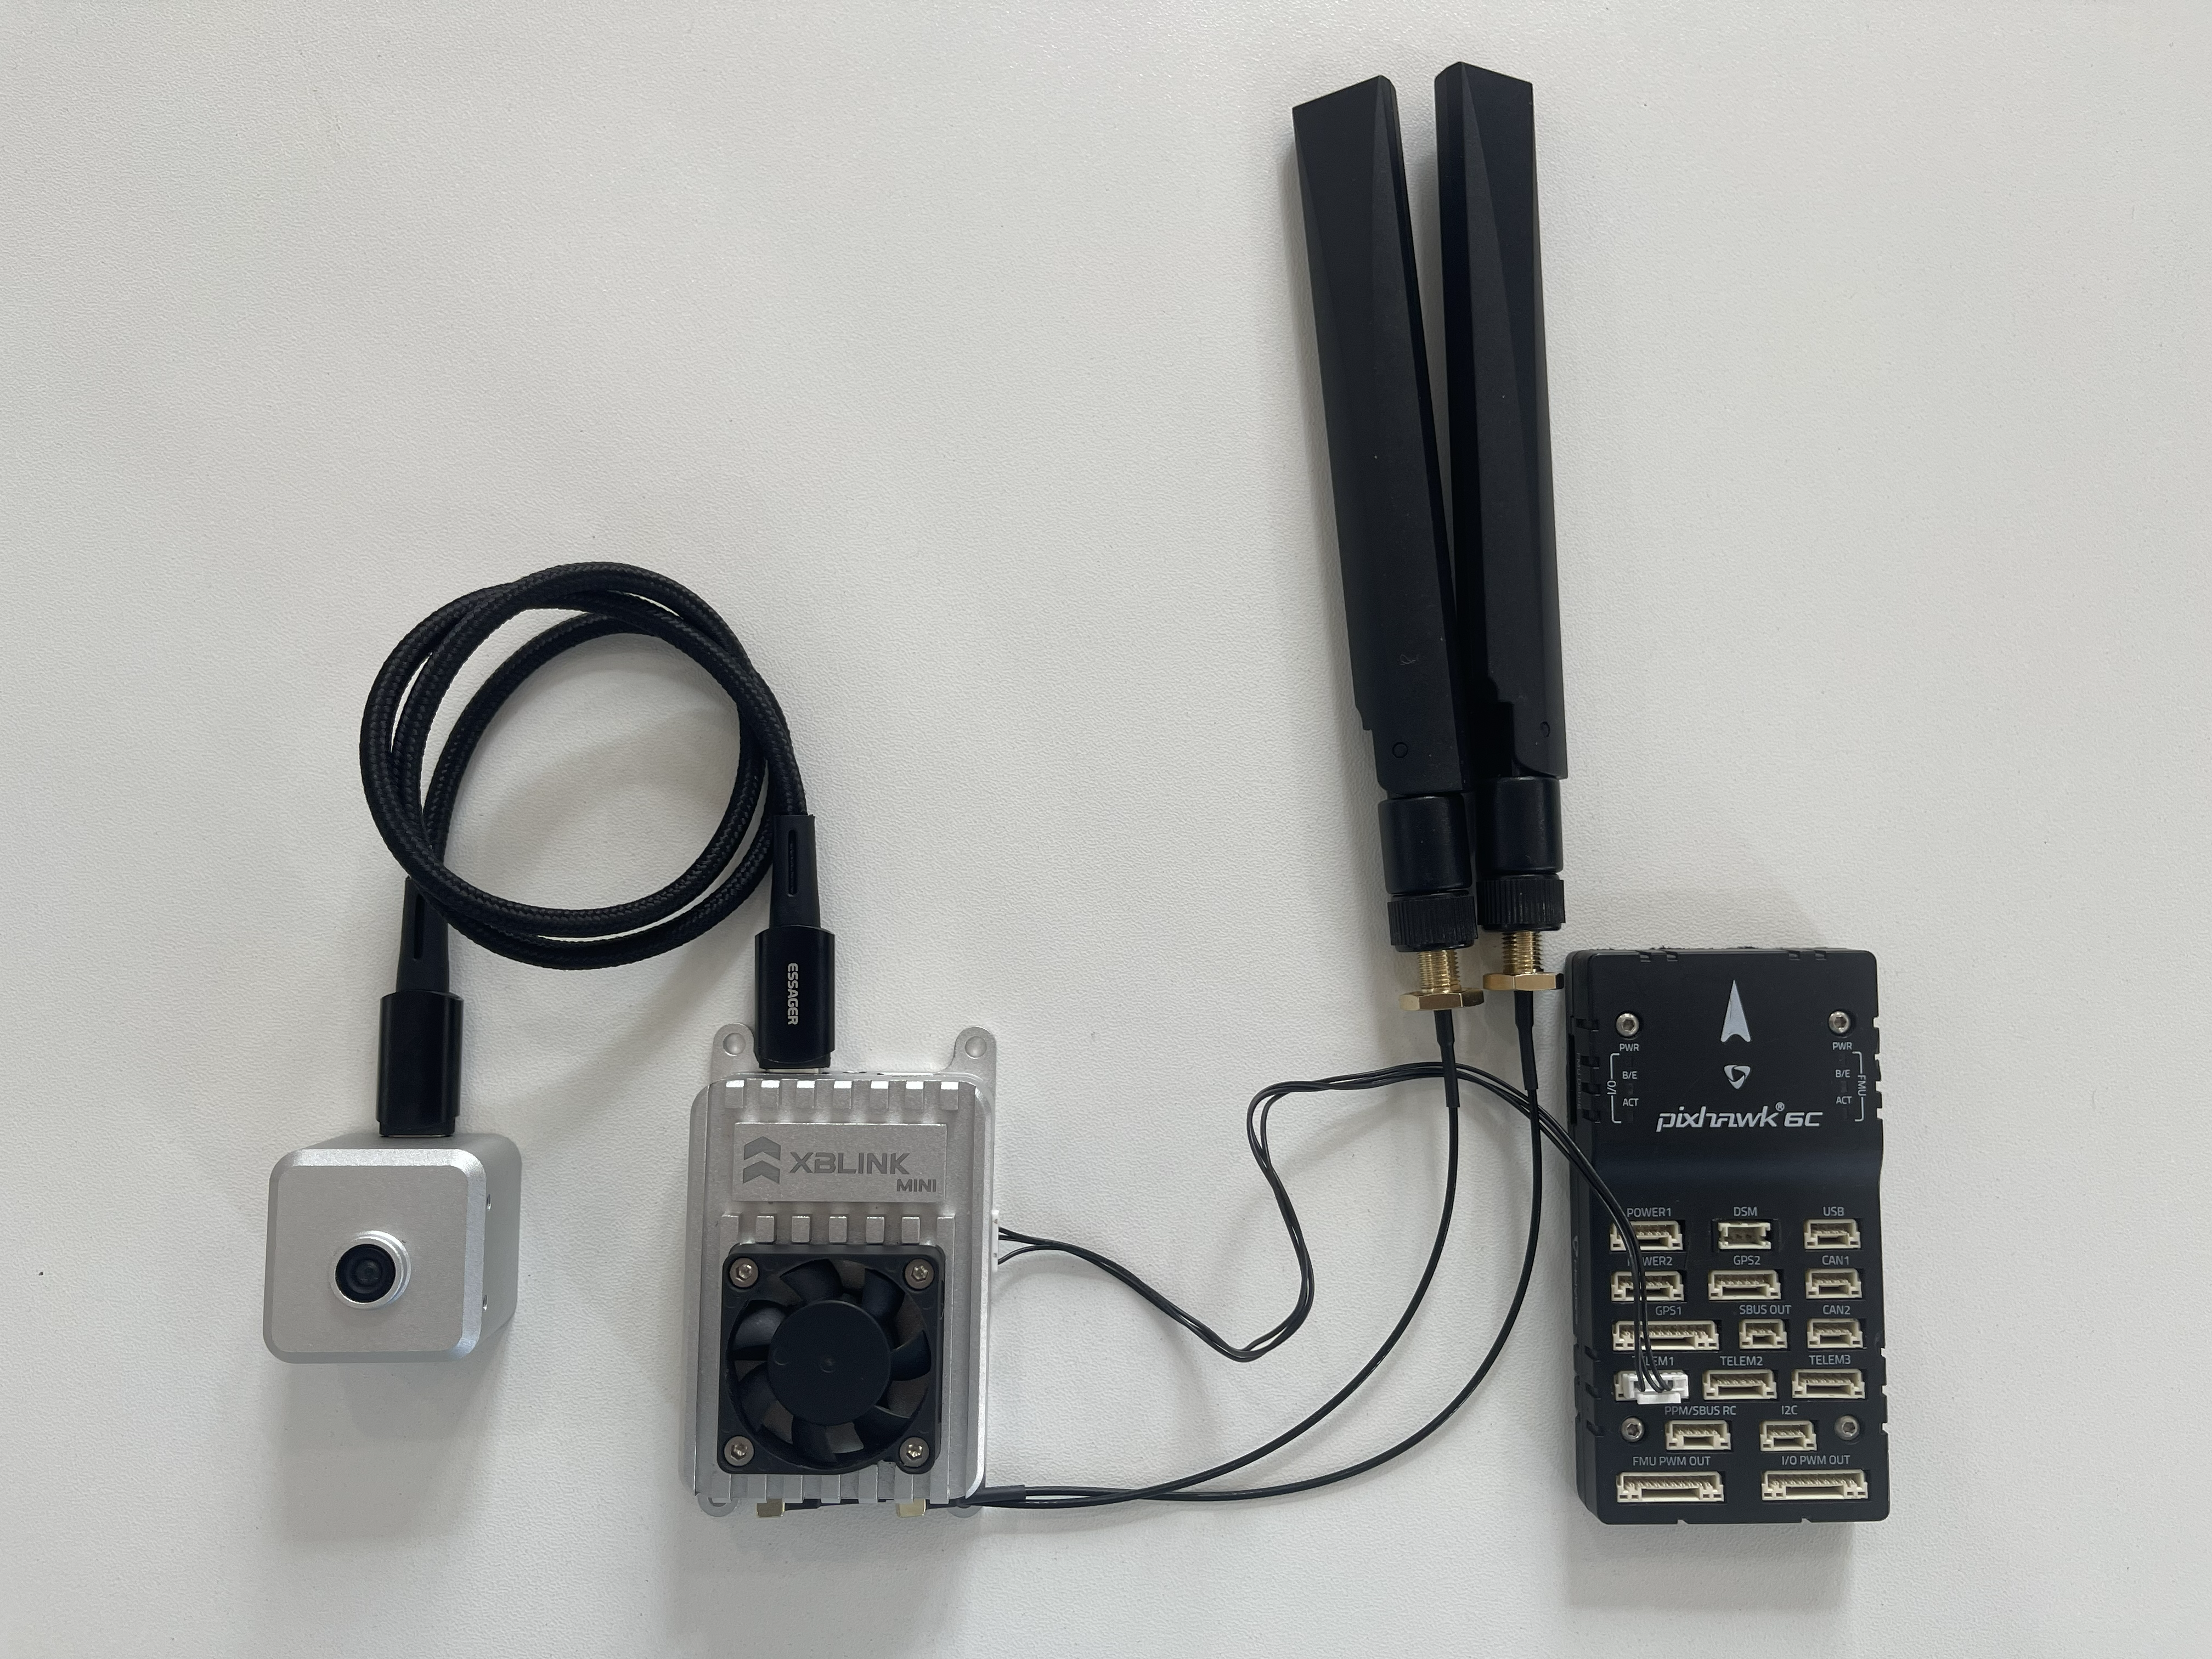
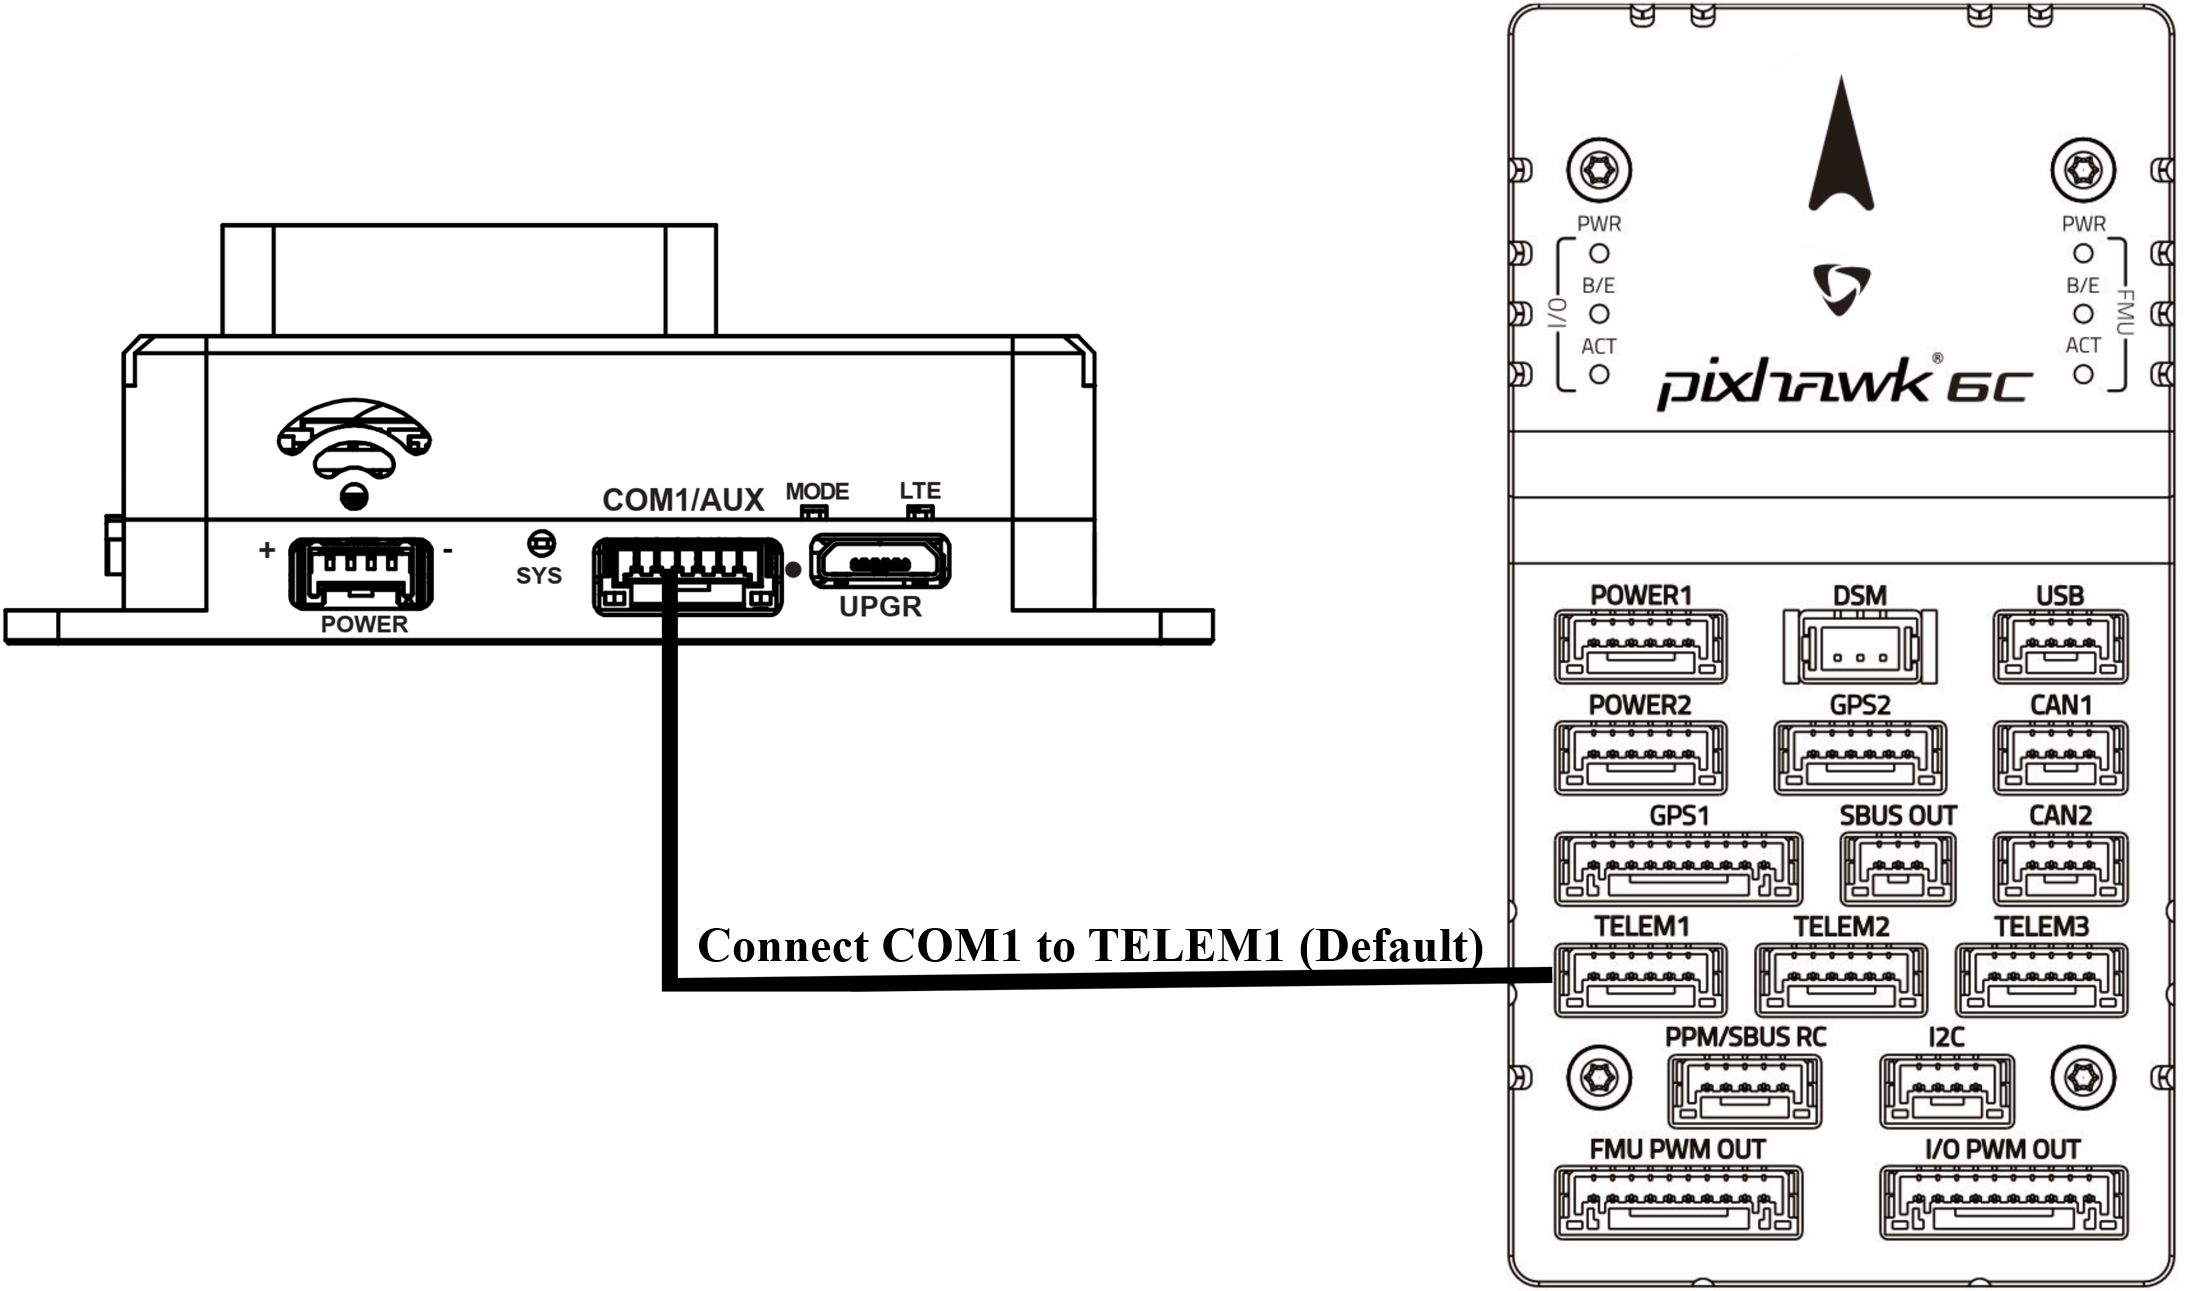
### 4. Connect Flight Controller
You can use Telemetry 1 or 2 of Pixhawk for connection with XBLink Mini via [**COM1/AUX**](/xblink-mini/user-manual/getting-started/interfaces.md#com1-aux-j3) port.
XBLink Mini connect to Pixhawk 6C
{% hint style="info" %}
**Note:** Config baud rate of Pixhawk to 57600, SERIAL1\_BAUD (Default 57, it means 57600), SERIAL1\_PROTOCOL: 2 (MAVLink 2)
{% endhint %}
### 5. Power up
XBLink Mini supports 7-30V voltage input. We highly recommend **3-4 S battery or 12V DC UBEC** **(minimum 1.42A)** to power (6S battery is possible but make sure its high quality and low discharge)
{% hint style="danger" %}
If you use low quality or high discharge 6S battery for drone, we are not responsible for damage.
{% endhint %}
### 6. Done
{% hint style="success" %}
Once XBLink Mini's LED has blinked a g**reen color** continue to the [next step](#step-2-configure-flight-controller).
{% endhint %}
#### More information: [here](https://youtu.be/npEB_8ehhlQ)
{% embed url="" %}
## Step 2: Configure Flight Controller
You can use Telemetry 1 or 2 of Pixhawk for connection with XBLink Mini. Telemetry 1 is normally used for Telemetry Radio (like: RFD900...) and Telemetry 2 for XBLink Mini.
The baud rate on XBLink Mini **must be same** with Pixhawk baud rate (Telemetry **1** or **2**).
* For ArduPilot : **SERIAL2\_BAUD = 57**(Default, it means 57600),
**SERIAL2\_PROTOCOL**=**2** (MAVLink 2)
#### **More information:** [**here**](https://ardupilot.org/copter/docs/common-telemetry-port-setup.html)
* For PX4: **SER\_TEL2\_BAUD = 57600** (Default 921600, you should change to 57600 for save data)
{% hint style="info" %}
**Note:** If you have problem with Telemetry 2 port, you can use Telemetry 1 Port
(Default baud rate Telemetry 1 is 57600, MAVLink:1).
XBLink Mini still works normally with both MAVLink 1 and MAVLink 2.
{% endhint %}
## Step 3: Connect XBStationPilotApp and Ground Station Software
1. Download: [here](/xblink-mini/user-manual/xbstationpilotapp/download.md)
2. Open [XBStationPilotApp](/xblink-mini/user-manual/xbstationpilotapp.md)
3. Login (Username and password in XBLink Mini's box)
4. Connect to [GCS](/xblink-mini/user-manual/xbstationpilotapp/ground-station.md)
#### **More detail, refer this link:** [**here**](https://youtu.be/8mLK-jrc7eE)
{% embed url="" %}
## Step 4: Test and Flight
1. Put XBLink Mini on your drone
2. Check the connection between XBLink Mini to Pixhawk, Camera, SIM Card, Antennas
3. Connect battery
4. Waiting about 30s for XBLink Mini start up
5. Check led Indicator: [LED meanings](/xblink-mini/user-manual/getting-started/led-indicator.md)
6. Open XBStationPilotApp, Login
7. Connect to GCS: QGroundControl or Mission Planner
### **Optional: Register your Email and change your Password**
Please refer this link:
{% content-ref url="/pages/TWwMMkNe9HeHHLFNWdlb" %}
[Register Your Email](/xblink-mini/xbcloud/pilot.md)
{% endcontent-ref %}